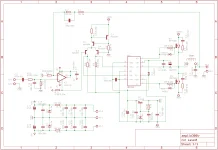
The world of vintage audio restoration is a meticulous discipline, requiring a blend of electrical engineering expertise, forensic patience, and a deep respect for historical hardware. Recently, a classic Nikko Alpha III power amplifier—a unit highly regarded for its robust architecture and distinct sonic signature—found its way onto the workbench of a dedicated enthusiast. Acquired from an estate sale, the unit presented a common yet challenging symptom: it refused to emerge from "protection mode."
For the vintage audio community, "protection mode" is the electronic equivalent of a system-wide diagnostic alert. It signifies that the amplifier’s internal circuitry has detected a potential fault—typically DC voltage leaking onto the speaker outputs—and has tripped a relay to prevent catastrophic damage to connected loudspeakers. This article examines the diagnostic process currently underway to revive this piece of audio history.
The Core Problem: Understanding the Protection Circuit
At the heart of the Nikko Alpha III’s protection system is a fail-safe mechanism designed to safeguard both the amplifier’s output transistors and the user’s expensive speaker arrays. When the unit fails to "click" out of protection, it is an indicator that the DC offset—the amount of stray direct current flowing to the outputs—has exceeded safe parameters.
In this specific case, the owner, identified in the community as "Philster," initiated a systematic triage of the unit. The initial phase involved verifying that the power supply rails were receiving correct voltages. Using a Dim Bulb Tester (DBT)—a critical tool for vintage repairs that limits current draw and prevents further damage during the initial power-up of a potentially faulty device—the owner confirmed that the voltage rails were intact. Furthermore, measurements taken at the voltage regulator stage showed correct voltages across the Zener diodes and at the collectors of the regulators, effectively ruling out a catastrophic power supply failure.
Chronology of the Diagnostic Process
Phase 1: Initial Assessment and Power Supply Verification
Upon acquiring the unit from an estate sale, the first hurdle was determining if the power supply was functional. Restoration enthusiasts often prioritize the power supply because if the rails are not balanced, the rest of the amplifier cannot function, and troubleshooting becomes a moving target. By confirming stable rail voltages, the diagnostic effort shifted from the "front end" (the power supply) to the "back end" (the output stage and protection logic).
Phase 2: Evaluating the MOSFET Output Stage
The Nikko Alpha III is known for its use of MOSFETs in the output stage, which provide a specific, warm, and highly linear sound profile. When an amplifier enters protection, these components are the primary suspects. Philster sought guidance from the DIYAudio community, questioning whether he should desolder and remove the MOSFETs to test them individually.
Community member "adason" provided crucial guidance: removing the MOSFETs is not strictly necessary for an initial diagnostic. MOSFETs that have failed "open" or "shorted" can often be identified through a simple diode test while still mounted on the heat sinks. By measuring the voltage drop between the source and drain pins, a technician can quickly differentiate between a healthy MOSFET and one that has succumbed to thermal runaway or electrical overstress.
Phase 3: The DC Offset Investigation
Following the advice of experienced peers, the investigation moved toward the speaker output terminals. The consensus in the repair community is that the protection relay is usually triggered by an accumulation of DC voltage at the output stage. If the voltage measured before the relay is near zero, the protection circuit itself might be the culprit. If, however, the voltage is close to the rail voltage, it confirms a definitive failure in the output transistors.
Supporting Data: Technical Considerations for MOSFETs
When testing MOSFETs in an amplifier like the Nikko Alpha III, technicians rely on the specific behavior of the semiconductor junction. A standard diode test on a multimeter measures the voltage drop across a P-N junction.
- The Procedure: By placing the multimeter leads across the source and drain, a technician should observe a consistent voltage drop—typically between 0.4V and 0.9V depending on the specific component architecture.
- The Interpretation: If the reading deviates wildly from this range or shows a dead short, it serves as a smoking gun. This rapid testing method saves hours of labor, as desoldering high-power output transistors from a dense, vintage PCB is a delicate process that carries the risk of lifting copper traces or damaging fragile, aged components.
Official Perspective and Community Wisdom
The repair of legacy equipment like the Nikko Alpha III often lacks "official" support from the original manufacturer, as the company has long since evolved, and service manuals are often relegated to digital archives maintained by enthusiasts. Thus, the community has become the de facto support network.
The dialogue between Philster and adason highlights a fundamental philosophy in modern restoration: "Measure twice, solder once." By prioritizing non-invasive tests—such as checking for DC offset at the output before the relay and performing diode tests on the MOSFETs—the restorer minimizes the risk of collateral damage. This cautious approach is essential when dealing with vintage circuit boards, where the adhesive holding the copper tracks to the substrate may have become brittle over four decades of thermal cycling.
Implications for Vintage Audio Preservation
The struggle to repair a single Nikko Alpha III is representative of a larger movement in the consumer electronics sector: the Right to Repair. Vintage amplifiers are built with discrete components that are, in principle, repairable indefinitely, provided the technician has the knowledge to troubleshoot them.
Sustainability and the "Throwaway" Culture
In contrast to modern digital amplifiers, which often rely on proprietary integrated circuits (ICs) that become obsolete within a decade, the Nikko Alpha III represents an era of "serviceable engineering." Every capacitor, resistor, and MOSFET in this unit can be sourced or replaced with modern equivalents. When an enthusiast takes the time to diagnose a protection circuit rather than discarding the unit, they are preventing e-waste and preserving a high-fidelity artifact.
The Value of Knowledge Sharing
The collaborative nature of forums like DIYAudio acts as a repository of institutional knowledge. Without the ability to crowdsource diagnostic steps, many of these vintage units would end up in landfills. By documenting the process—from the initial DBT power-up to the granular details of MOSFET diode testing—the community ensures that the legacy of high-end audio engineering remains accessible to the next generation of engineers and hobbyists.
Conclusion: The Path Forward
As of the latest update, the investigation is moving into the final stage of diagnostic verification. With the power supply cleared and the methodology for testing the output MOSFETs established, the path to restoration is clear. The owner, Philster, intends to check the DC voltage on the main amplifier boards at pin 12, which serves as the interface for the protection relay.
This systematic approach serves as a masterclass in amplifier repair. By isolating variables, utilizing community-vetted diagnostic techniques, and maintaining a methodical pace, the restoration of the Nikko Alpha III is not just a technical challenge—it is an act of preservation. Once the faulty MOSFETs are identified and replaced, and the DC offset is balanced, the unit will likely return to its primary purpose: delivering the clean, powerful, and precise audio performance that defined the Nikko brand in its heyday.
For those following the thread, the takeaway is clear: vintage audio repair is rarely about replacing everything; it is about finding the one component that stands between a silent machine and a symphony of sound. As the restoration continues, it serves as a testament to the enduring quality of classic hardware and the vibrant, helpful community that keeps it alive.