In the high-fidelity audio community, few names command as much respect as Nelson Pass. As the founder of Pass Labs and the creator of the FirstWatt line, Pass has spent decades exploring the sonic boundaries of minimalist, class-A amplification. Among his most celebrated designs is the "Aleph J," a circuit that has become a rite of passage for DIY audio enthusiasts worldwide. This guide serves as an extensive examination of the construction, philosophy, and technical implementation of the Aleph J, based on the foundational work of the diyAudio community.

Main Facts: The Philosophy of the Aleph J
The Aleph J is not merely an amplifier; it is a testament to the "less is more" school of electronic engineering. Unlike high-power, high-feedback designs that prioritize objective measurements over subjective listening experiences, the Aleph J prioritizes the "first watt"—the power level where most critical listening occurs.

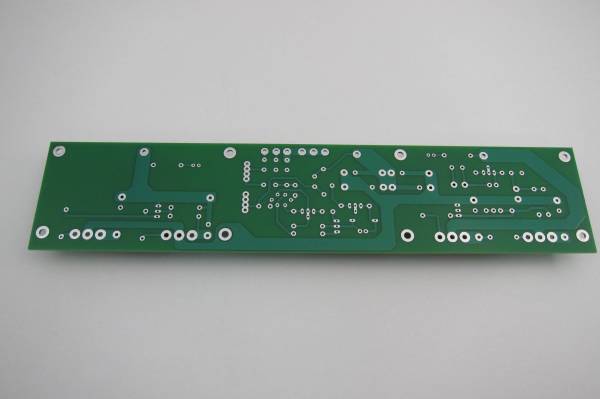
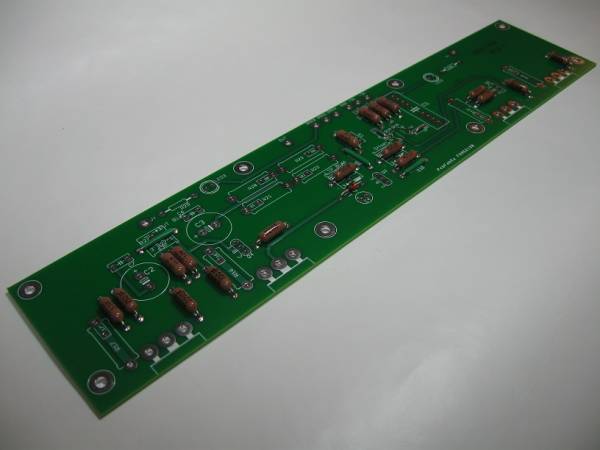
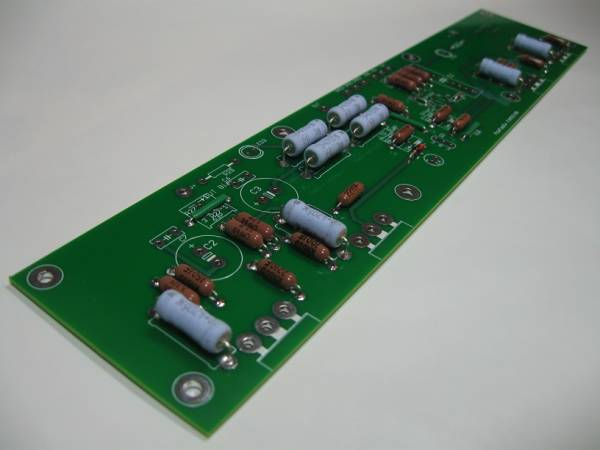
At its core, the Aleph J is a single-ended class-A amplifier. It utilizes a sophisticated constant-current source (CCS) to manage the output stage, allowing for a remarkably linear transfer function. The circuit is celebrated for its warm, tube-like harmonic profile, despite being built entirely from solid-state components. For the DIY builder, the project represents a bridge between complex engineering and accessible hobbyist construction. The design relies on high-quality circuit boards, specifically developed for the Aleph J, which facilitate a modular build process that allows for individual customization of passive components.
Chronology: From Concept to DIY Staple
The journey of the Aleph J from a niche commercial product to a DIY project followed a deliberate path of community collaboration:
- Original Conception: Nelson Pass released the Aleph J as part of the FirstWatt lineup to showcase the efficacy of his proprietary "Aleph" current-source topology.
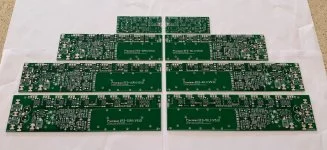
- Community Adaptation: Recognizing the demand for a accessible version of the circuit, members of the diyAudio community—most notably "Didiet78"—collaborated to design high-quality PCBs that replicated the original circuit’s layout and functionality.
- Prototyping Phase: Early builders tested green prototype boards. These prototypes verified that the circuit layout was sound, requiring only minor tweaks to the trace routing before the release of the final, blue-masked production boards.
- Standardization: The project reached maturity when the community established a "Universal Mounting Spec," allowing builders to use standardized chassis (such as the 4U and 5U "Big Amp" series) to house the power supply and amplification boards efficiently.
- Documentation: The publication of official manuals, Bills of Materials (BOMs), and annotated build logs transformed the Aleph J into a well-supported educational resource for electronics hobbyists.
Technical Specifications and Supporting Data
Building an Aleph J requires careful adherence to specific technical protocols to ensure safety and sonic performance.
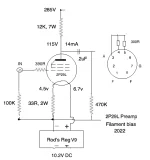
The Power Supply
The heart of the Aleph J is its power supply. It follows a traditional "Pass-style" linear power supply architecture:

- Transformer: A 300VA transformer (18V+18V) is the recommended standard. While higher VA ratings are permissible, 300VA is the design baseline.
- Capacitance: The filtering stage typically uses eight 15,000uF capacitors (rated at 25V or higher). These capacitors form a CRC (Capacitor-Resistor-Capacitor) filter network, which is essential for reducing ripple and providing the clean current necessary for class-A operation.
- Rectification: Builders often utilize monolithic diode bridges, though discrete diodes are also a viable option for those looking to tune the sonic signature of the power supply.
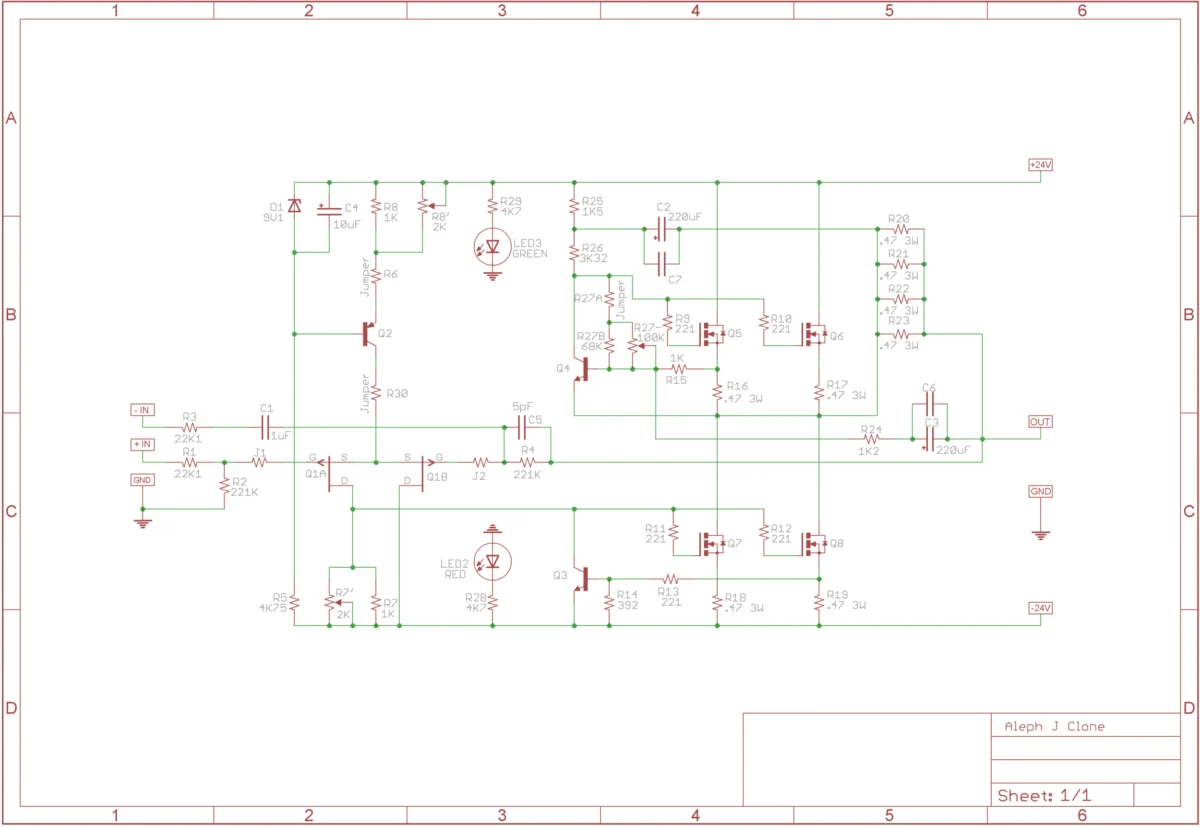
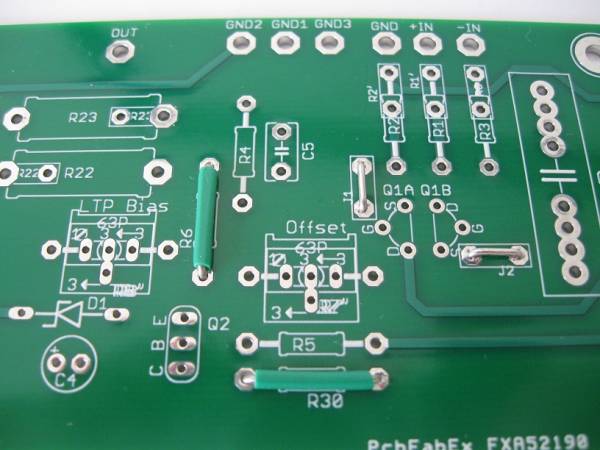
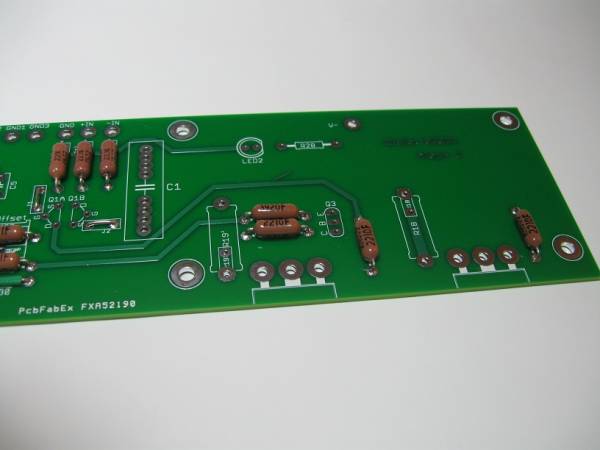
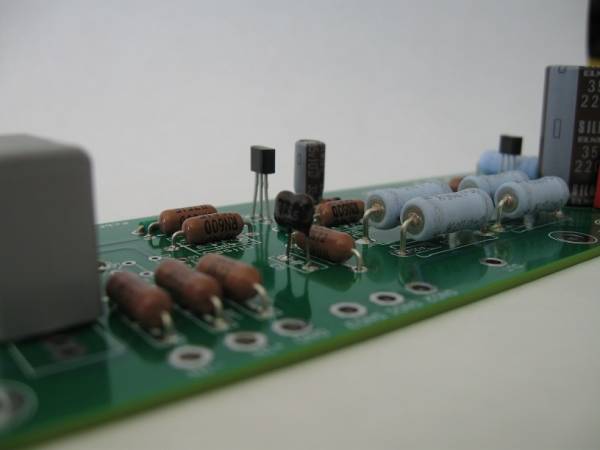
PCB Assembly and "Stuffing"
The process of "stuffing" (populating) the PCB should follow a logical sequence:
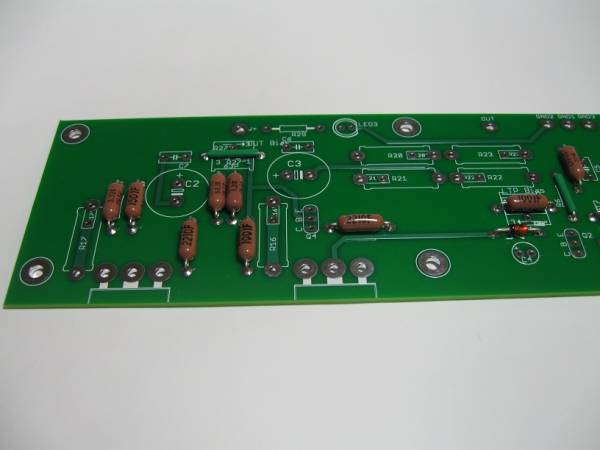
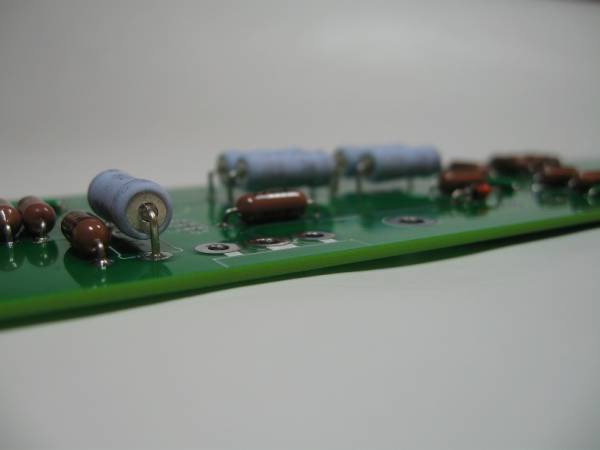
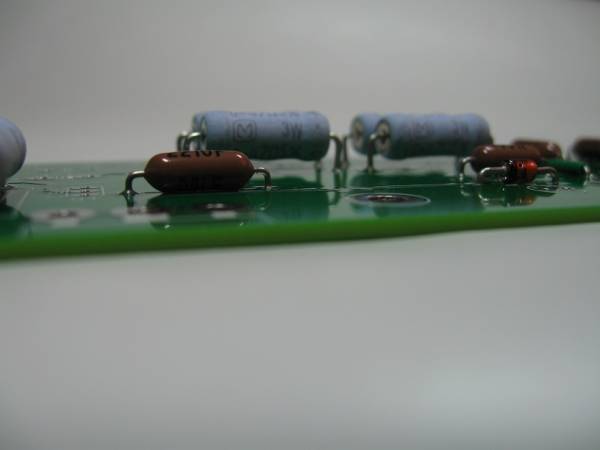
- Low-Profile Components: Start with jumpers (R6, R30, J1, J2). These act as placeholders for potential oscillation-suppression resistors, should the specific build require them.
- Resistor Calibration: Precision is paramount. Builders are advised to measure every resistor with a multimeter before installation. The use of high-quality resistors, such as Dale RN60 series, is common practice among audiophile builders.
- Transistor Management: The Aleph J utilizes Power MOSFETs. The MOSFETs on the left side of the PCB control the constant current source, while those on the right are the output devices. Thermal management is critical here; these components will run very hot, necessitating secure mounting to the amplifier’s massive heatsinks.
- Adjustment Potentiometers: The LTP (Long-Tailed Pair) bias and DC offset are adjusted via potentiometers. Multi-turn pots are highly recommended over single-turn variants to allow for the precise, granular adjustment required to achieve the "zero" offset necessary for safe speaker operation.
Official Responses and Builder Wisdom
Nelson Pass has historically been a proponent of the DIY community, often providing the original schematics and manuals free of charge to encourage experimentation. His "official" stance on the Aleph J is one of encouragement for those who wish to learn.
Expert builders (like 6L6, who documented the primary guide) emphasize that "perfection is the enemy of the good." They note that while some builders obsess over the brand of capacitors or the specific type of solder, the core of the Aleph J’s success lies in the circuit design itself. A recurring piece of advice from the community is to prioritize chassis ventilation. Because the Aleph J is a class-A design, it operates at high temperatures constantly. A poorly ventilated chassis will lead to premature component failure and thermal shutdown. Whether using a 4U "Jack of all Chassis" or a 5U "Big Amp," the enclosure must facilitate significant airflow.
Implications: The Legacy of the Aleph J
The impact of the Aleph J on the audio industry and hobbyist culture is profound. By open-sourcing the design philosophy of a world-class engineer, the project has democratized high-end audio.
Educational Value
The Aleph J serves as a masterclass in electronics. Builders learn the intricacies of class-A biasing, the importance of power supply regulation, and the challenges of thermal management. It forces the builder to engage with the physics of electricity, rather than simply consuming a pre-packaged consumer product.
The "Sound" of DIY
Beyond the educational aspect, the implications for the user’s sound system are significant. The Aleph J provides a level of clarity and harmonic richness that often rivals commercial amplifiers costing several times the price of the DIY build. The project proves that with patience, a soldering iron, and a dedication to following the documentation, high-end performance is accessible to the average individual.
Future-Proofing
The modular nature of the Aleph J means it is never truly "finished." Builders can swap out input capacitors, upgrade the power supply capacitance, or experiment with different chassis materials to further refine the sound. As long as there are enthusiasts who appreciate the warm, organic signature of a well-built single-ended amplifier, the Aleph J will remain a cornerstone of the DIY audio movement.
Final Considerations
Before embarking on an Aleph J build, ensure you have access to a stable workspace and the necessary tools for precision soldering. Always double-check your connections—especially those involving the power supply—and verify that your heatsinks are adequately sized for the heat dissipation requirements of your specific bias settings. The Aleph J is a labor of love, but for the patient builder, the reward is an amplifier that is as satisfying to listen to as it was to construct.